Close Menu
AsiaTokenFundAsiaTokenFund
  • Home
  • Crypto News
    • Bitcoin
    • Altcoin
  • Web3
    • Blockchain
  • Trading
  • Regulations
    • Scams
  • Submit Article
  • Contact Us
  • Terms of Use
    • Privacy Policy
    • DMCA
What's Hot

Austin King Explains Why the Next 2 Years Are Critical for Crypto’s Future

June 3, 2025

Pepe Coin Price: Surprise 40% Rally in June Could Shock Sidelined Traders

June 3, 2025

Crypto Tax in Australia: What Changes From July 2025

June 3, 2025
Facebook X (Twitter) Instagram
Facebook X (Twitter) YouTube LinkedIn
AsiaTokenFundAsiaTokenFund
ATF Capital
  • Home
  • Crypto News
    • Bitcoin
    • Altcoin
  • Web3
    • Blockchain
  • Trading
  • Regulations
    • Scams
  • Submit Article
  • Contact Us
  • Terms of Use
    • Privacy Policy
    • DMCA
AsiaTokenFundAsiaTokenFund

Step-by-Step Guide to Importing NFTs from MetaMask to Immutable Passport

0
By Aggregated - see source on June 1, 2024 Blockchain
Share
Facebook Twitter LinkedIn Pinterest Email


As the NFT market continues to grow, users are seeking efficient ways to manage their digital assets across various platforms. According to Immutable.com, a detailed guide has been released to assist users in transferring their NFTs from MetaMask to Immutable Passport.

Prerequisites for NFT Transfer

To successfully transfer NFTs from MetaMask to Immutable Passport, users need the following:

  1. An Immutable Passport account (sign-up here).
  2. The MetaMask wallet address where the NFTs are stored.
  3. $IMX tokens on zkEVM in MetaMask to cover gas fees (tutorial on obtaining $IMX).

Note: Ensure you have sufficient $IMX for gas fees before initiating the transfer.

Step-by-Step Transfer Process

Step 1: Access Immutable Passport

First, navigate to the Immutable Passport website (https://passport.immutable.com/).

Immutable Passport sign in screen

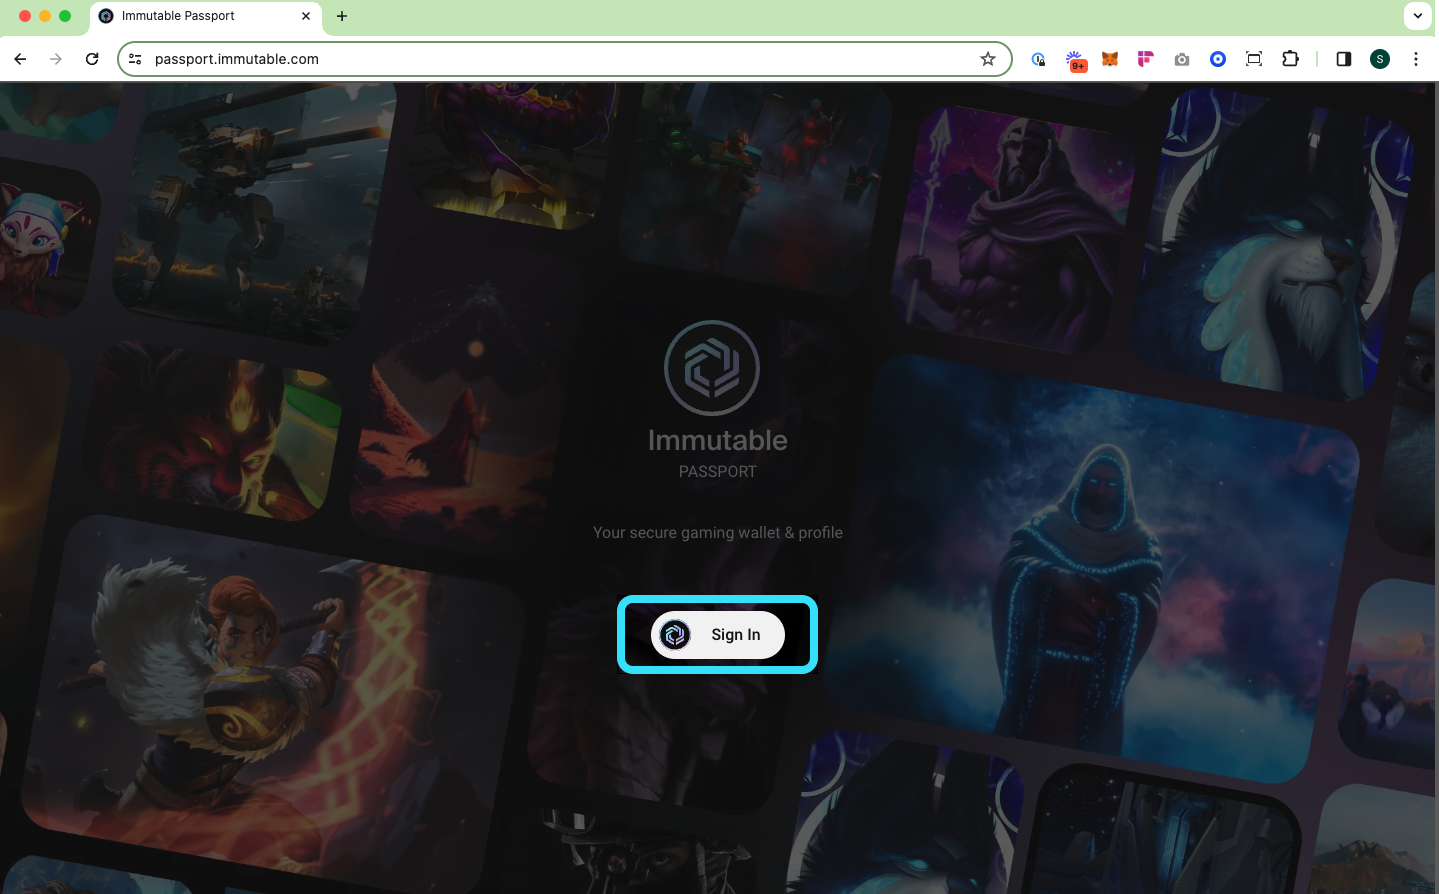
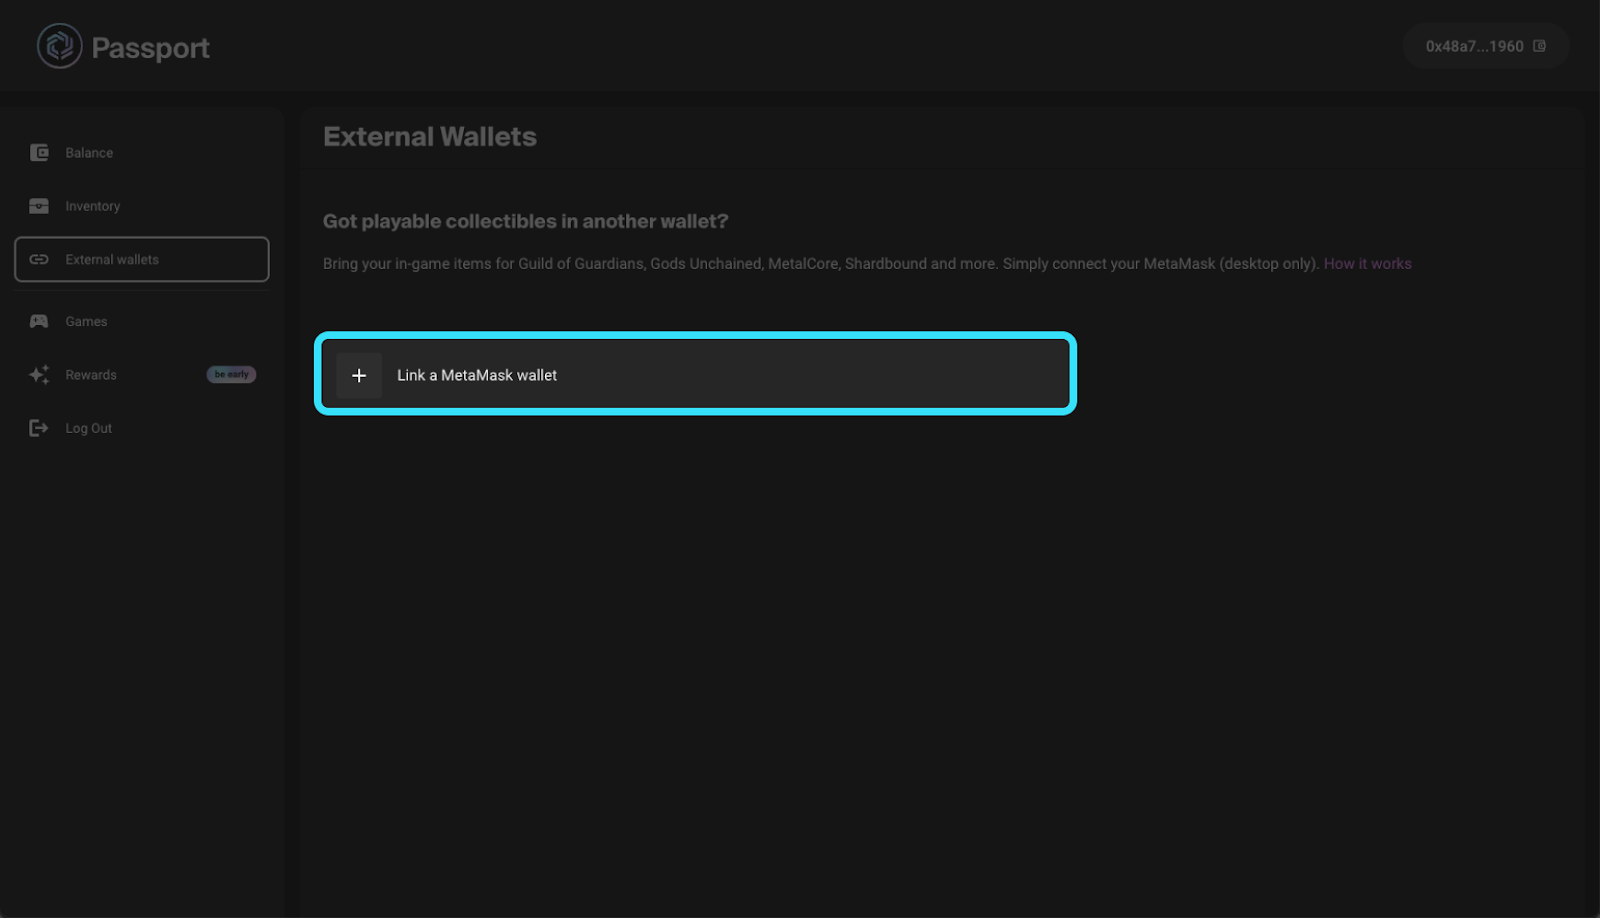
Step 2: Link MetaMask Wallet

Link your MetaMask wallet to your Immutable Passport and select “Import items to Passport”.

Screen grab showing 'Link a MetaMask wallet'

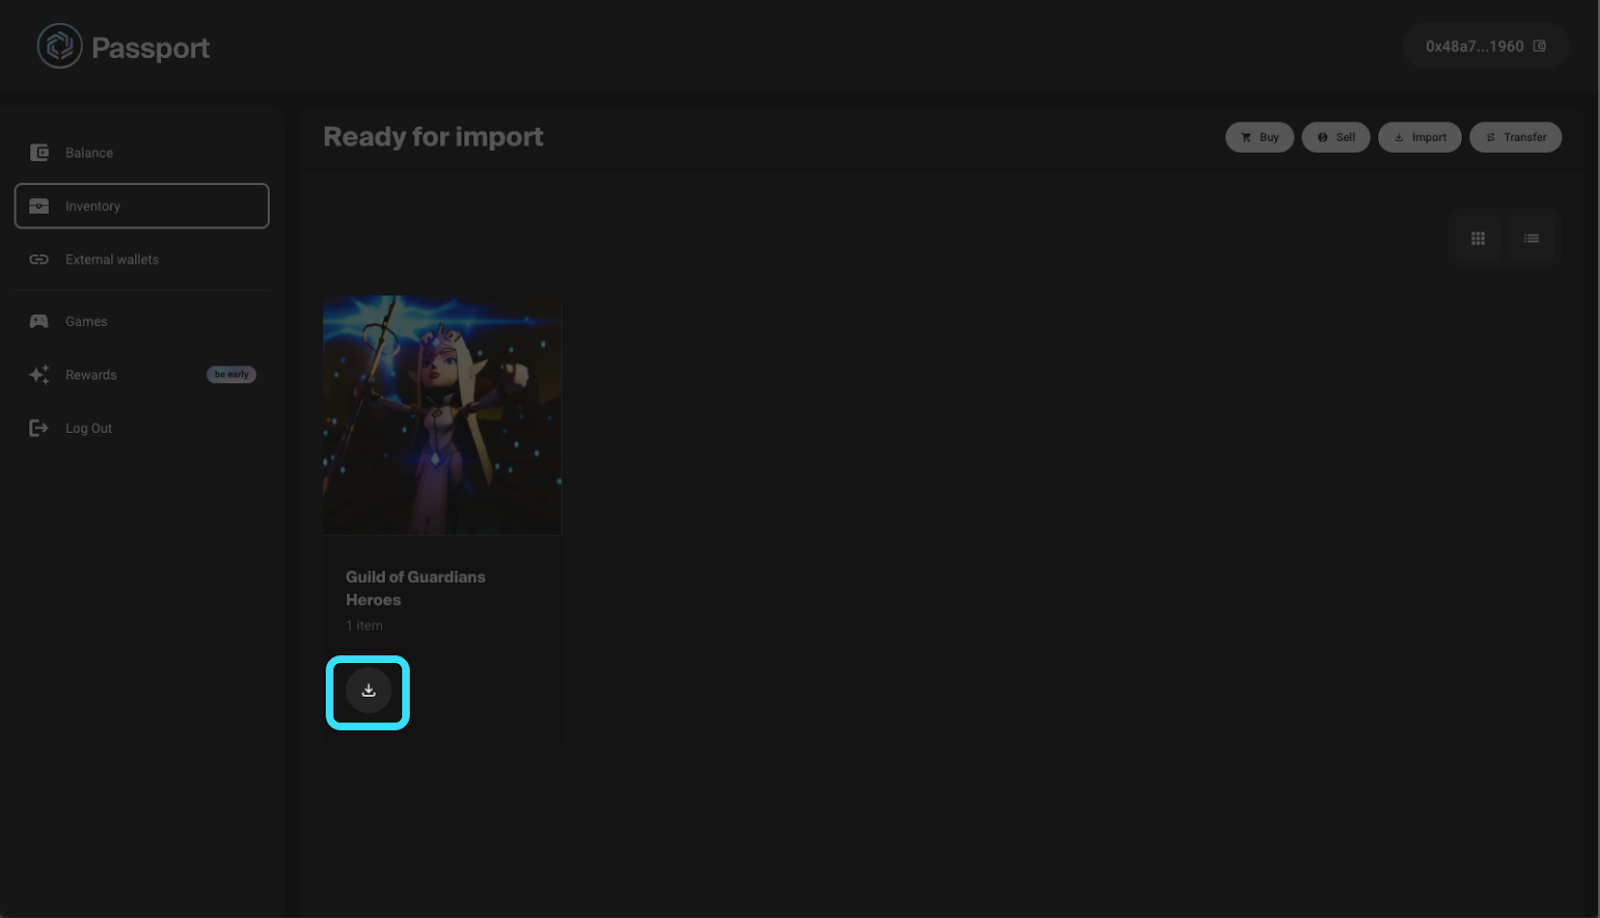
Step 3: Select NFTs for Import

After linking, your inventory will automatically pop up. Choose the collection and specific items you wish to import.

Selecting items for import

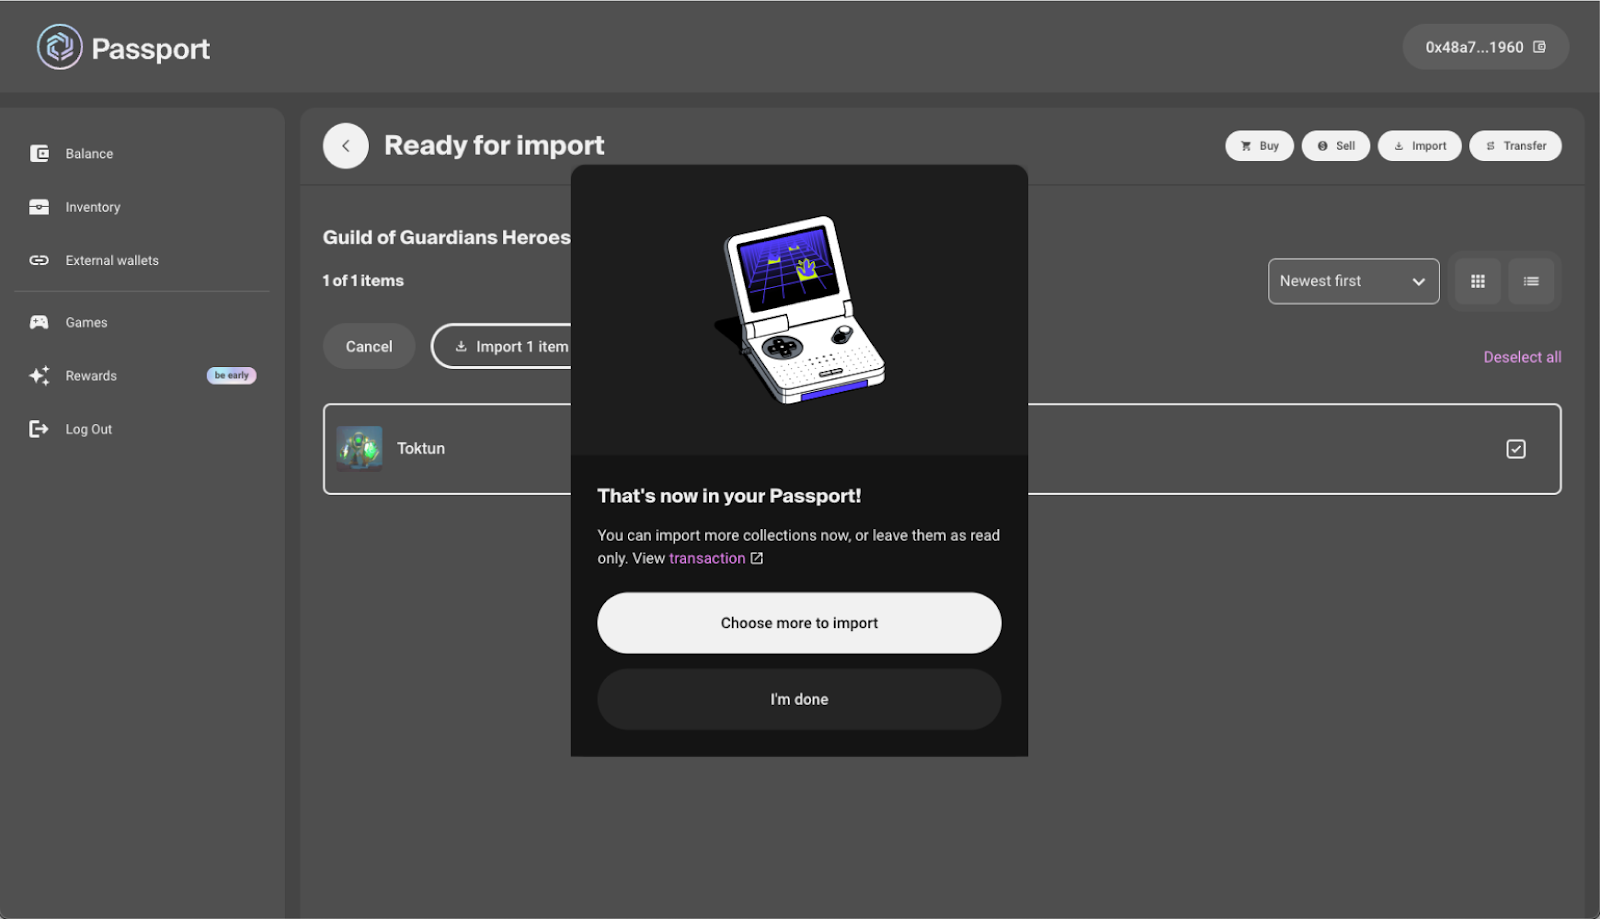
Step 4: Confirm the Import

Select ‘Import item’ and sign the transaction in your wallet. Make sure you have enough $IMX for the gas fees.

Transaction confirmation

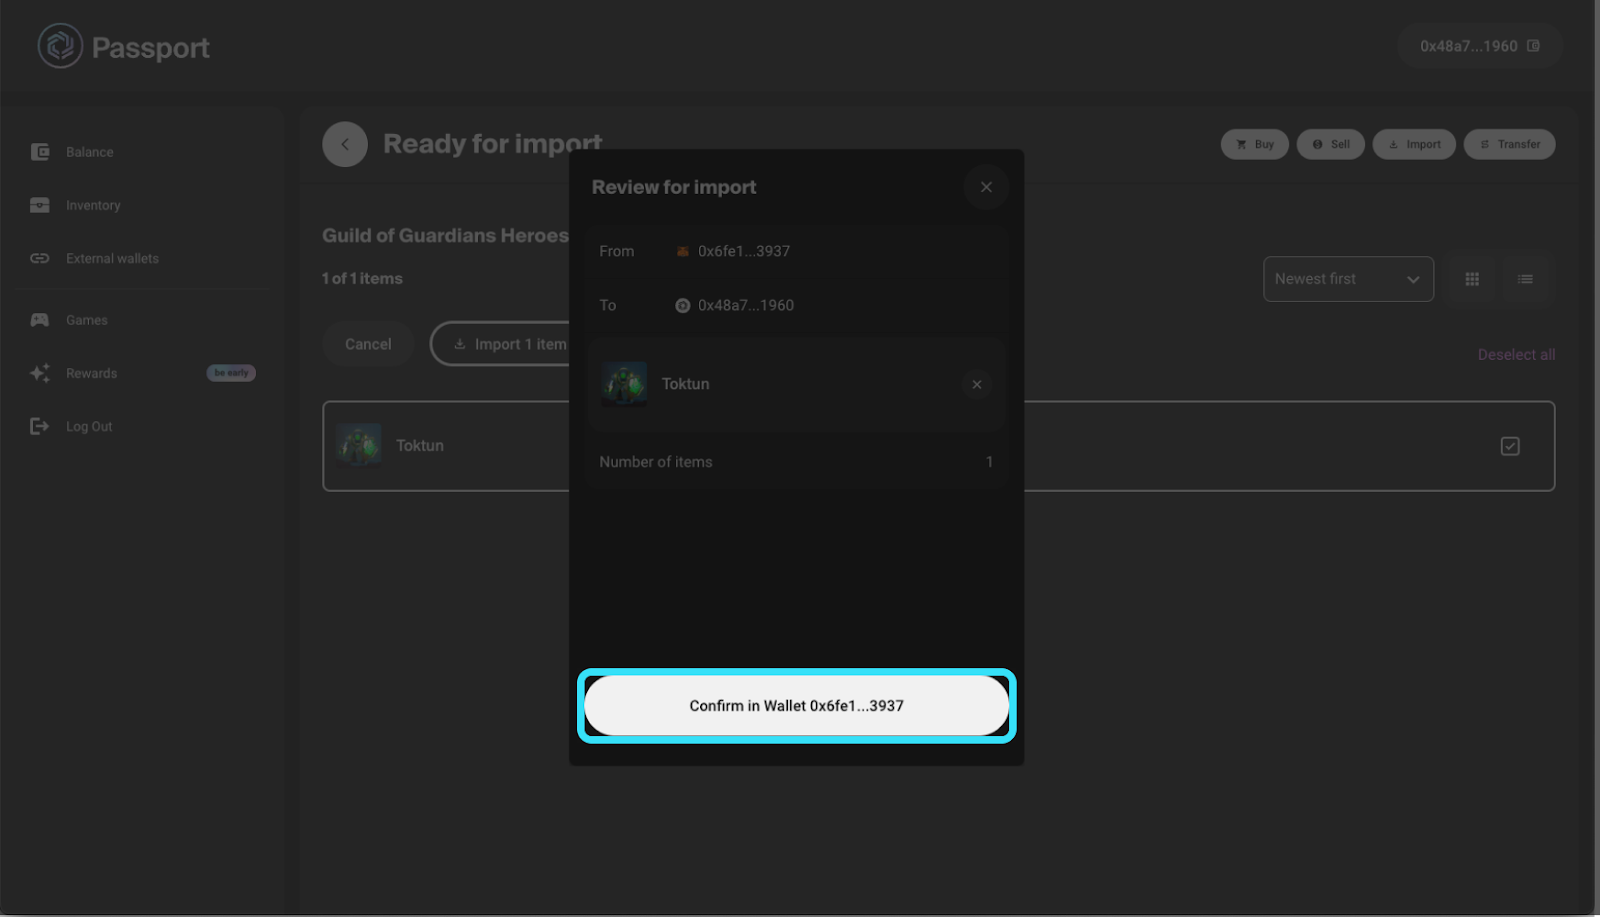
Once the transaction is confirmed, your NFTs will be successfully transferred to your Immutable Passport.

Success screen

Ensuring a Smooth Transfer

To ensure a seamless experience, verify that all prerequisites are met, and follow the steps carefully. For additional guidance on obtaining $IMX tokens for gas fees, refer to the official tutorial provided by Immutable.

Image source: Shutterstock

. . .

Tags


Credit: Source link

Share. Facebook Twitter Pinterest LinkedIn Tumblr Email

Related Posts

AI-Powered Interactivity Transforms Australia’s National Communication Museum

June 3, 2025

Coinbase Aware of Vendor Hack Long Before Disclosing: Report

June 3, 2025

Astar’s ACS Campaign Concludes with Significant Ecosystem Impact

June 3, 2025
Leave A Reply Cancel Reply

What's New Here!

Austin King Explains Why the Next 2 Years Are Critical for Crypto’s Future

June 3, 2025

Pepe Coin Price: Surprise 40% Rally in June Could Shock Sidelined Traders

June 3, 2025

Crypto Tax in Australia: What Changes From July 2025

June 3, 2025

Binance’s CZ Wants Investors To Take Risk With Bitcoin and Crypto, Here’s Why

June 3, 2025
AsiaTokenFund
Facebook X (Twitter) LinkedIn YouTube
  • Home
  • Crypto News
    • Bitcoin
    • Altcoin
  • Web3
    • Blockchain
  • Trading
  • Regulations
    • Scams
  • Submit Article
  • Contact Us
  • Terms of Use
    • Privacy Policy
    • DMCA
© 2025 asiatokenfund.com - All Rights Reserved!

Type above and press Enter to search. Press Esc to cancel.

Ad Blocker Enabled!
Ad Blocker Enabled!
Our website is made possible by displaying online advertisements to our visitors. Please support us by disabling your Ad Blocker.